All Activity
- Earlier
-
Ernesto joined the community
-
Rewiring my start battery wall
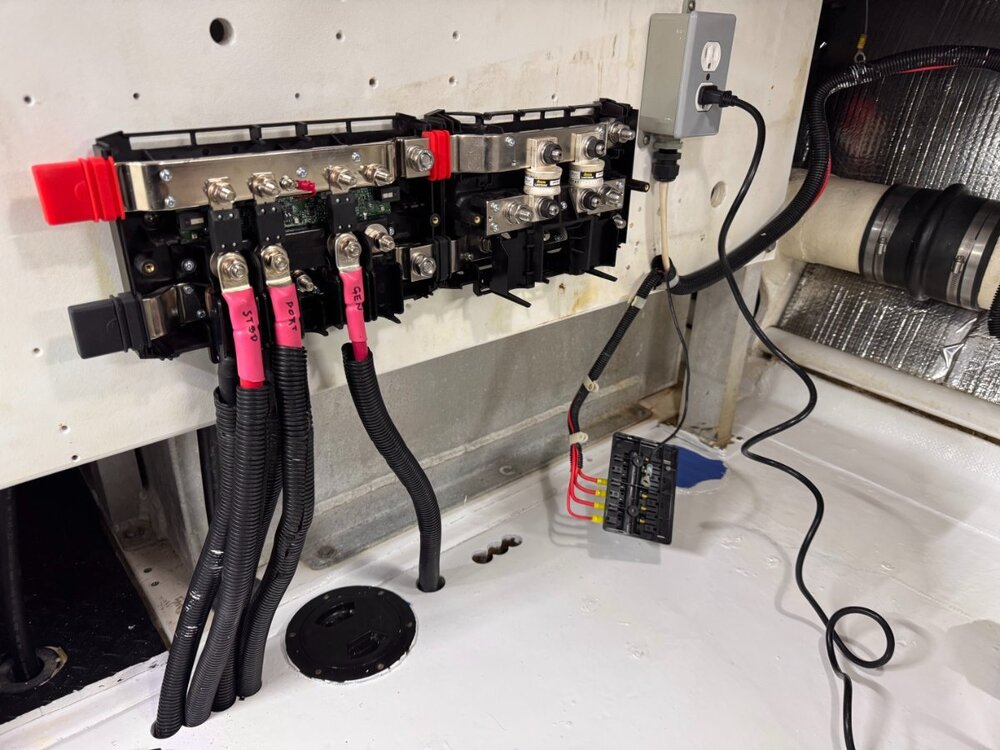
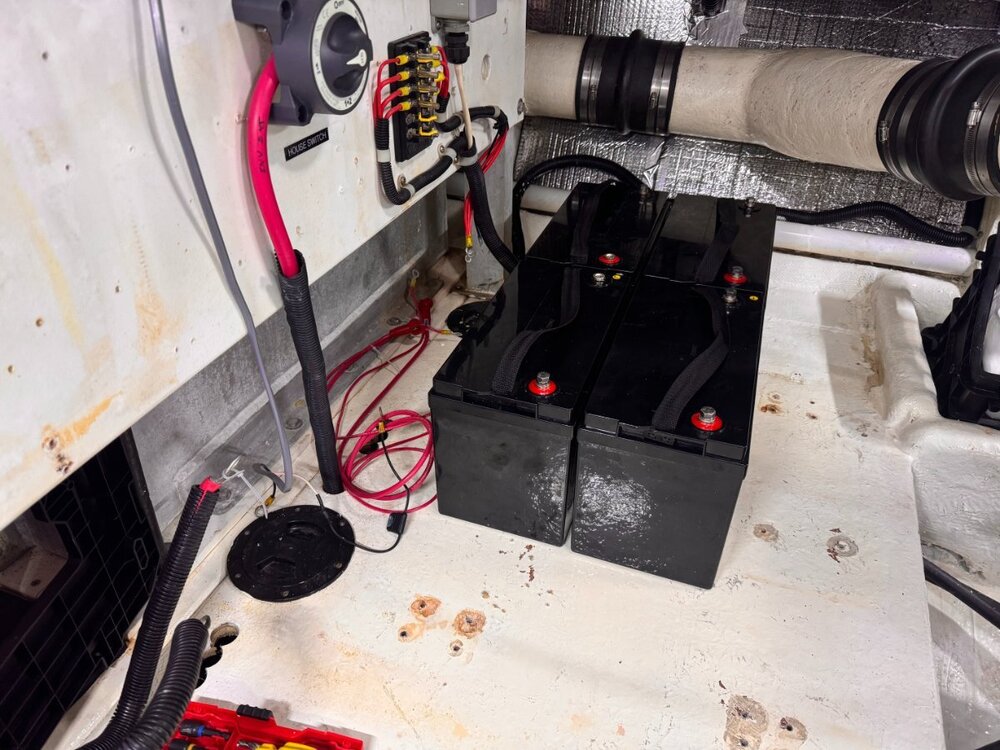
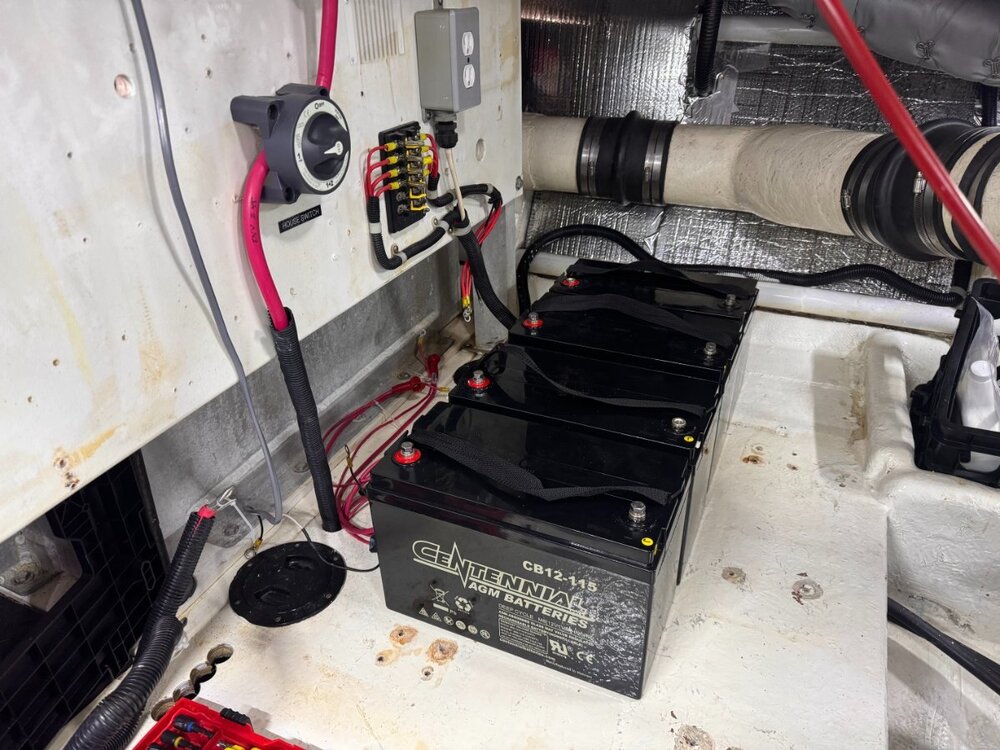
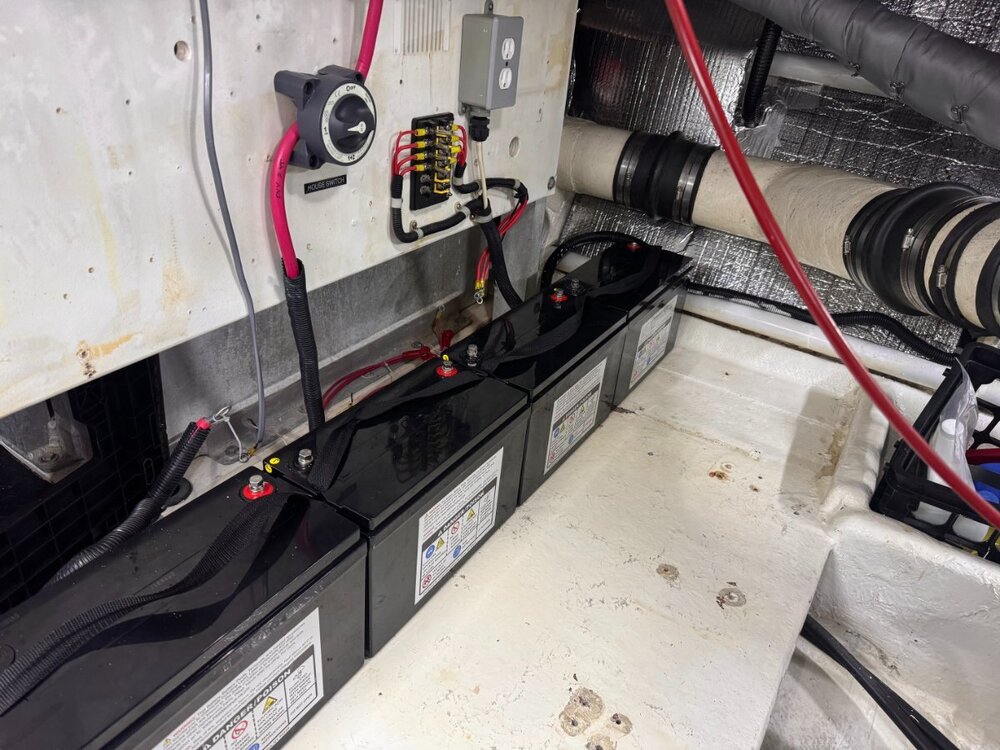
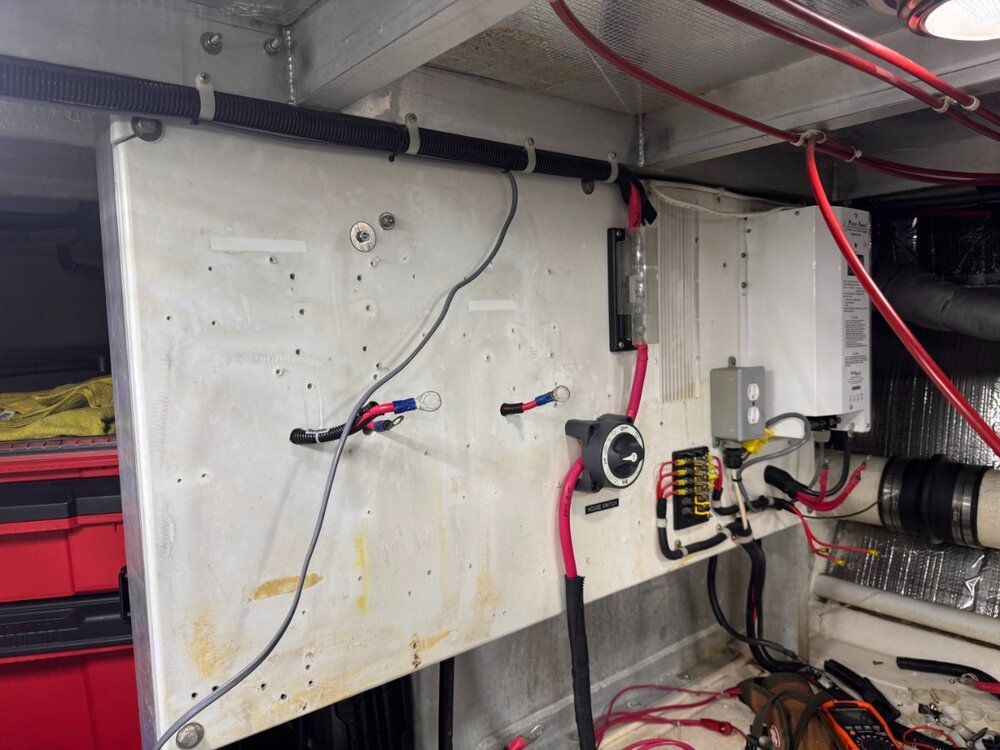
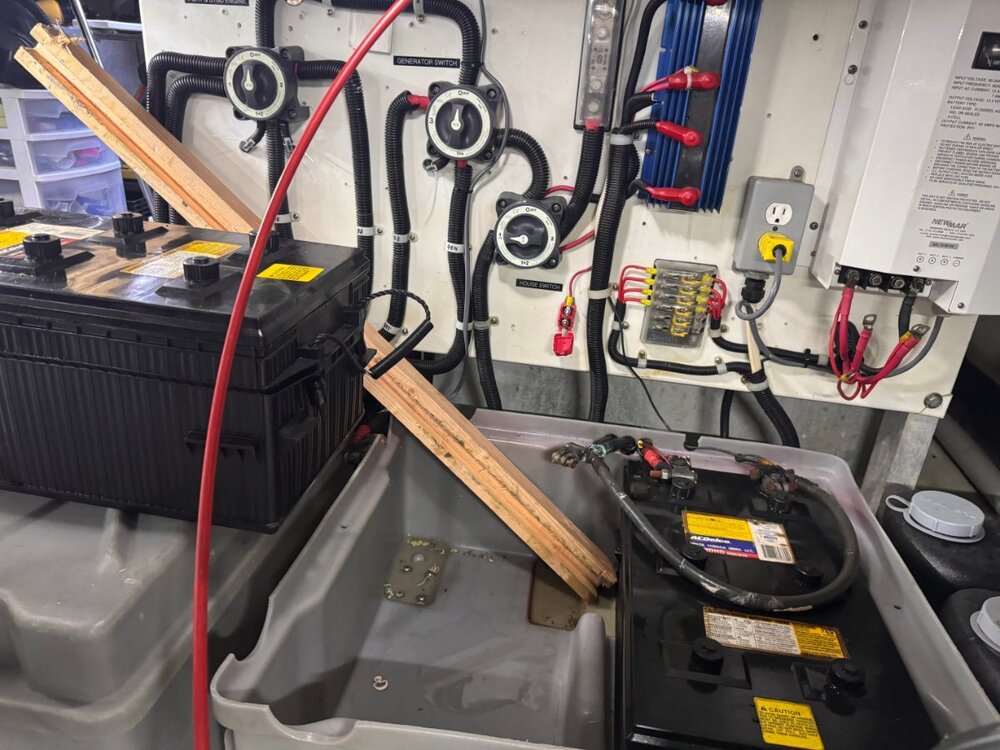
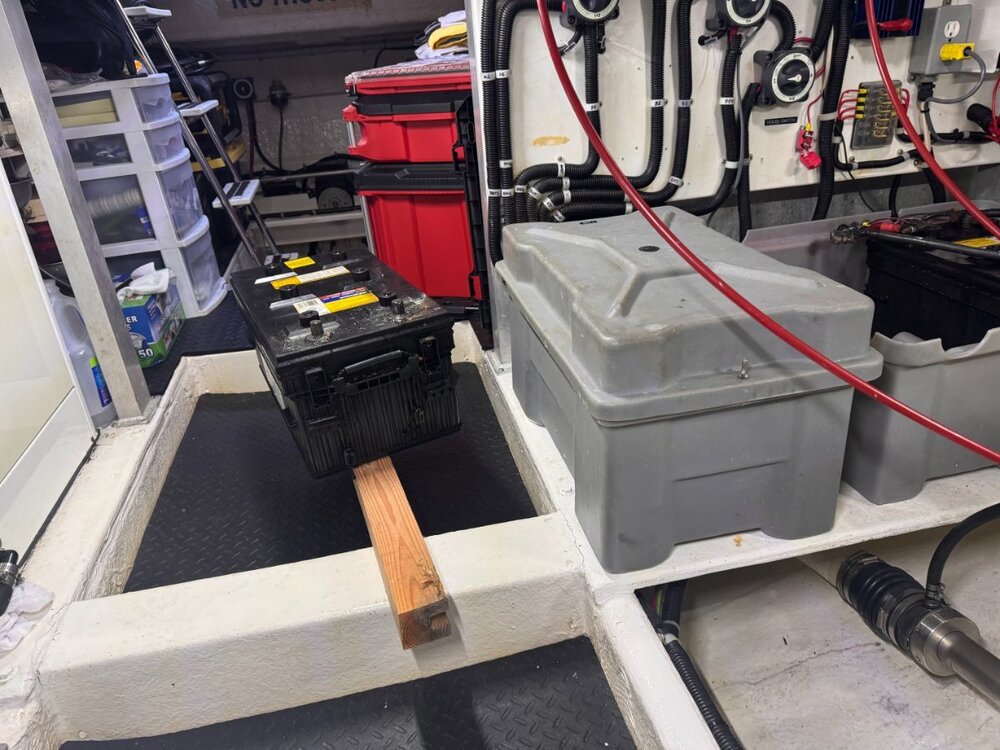
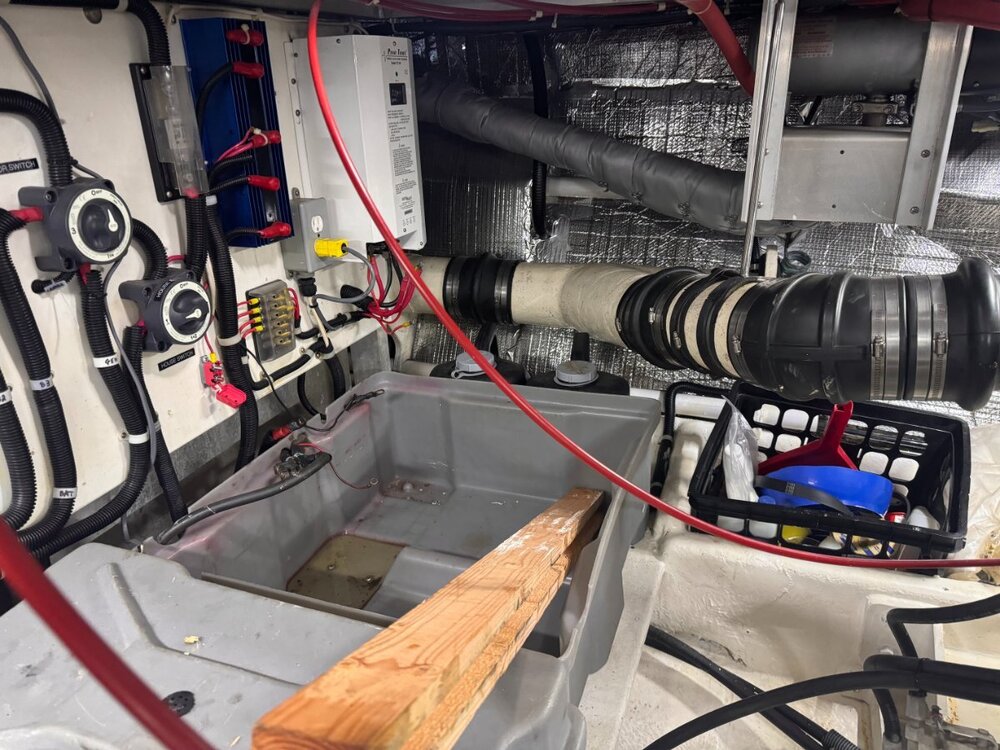
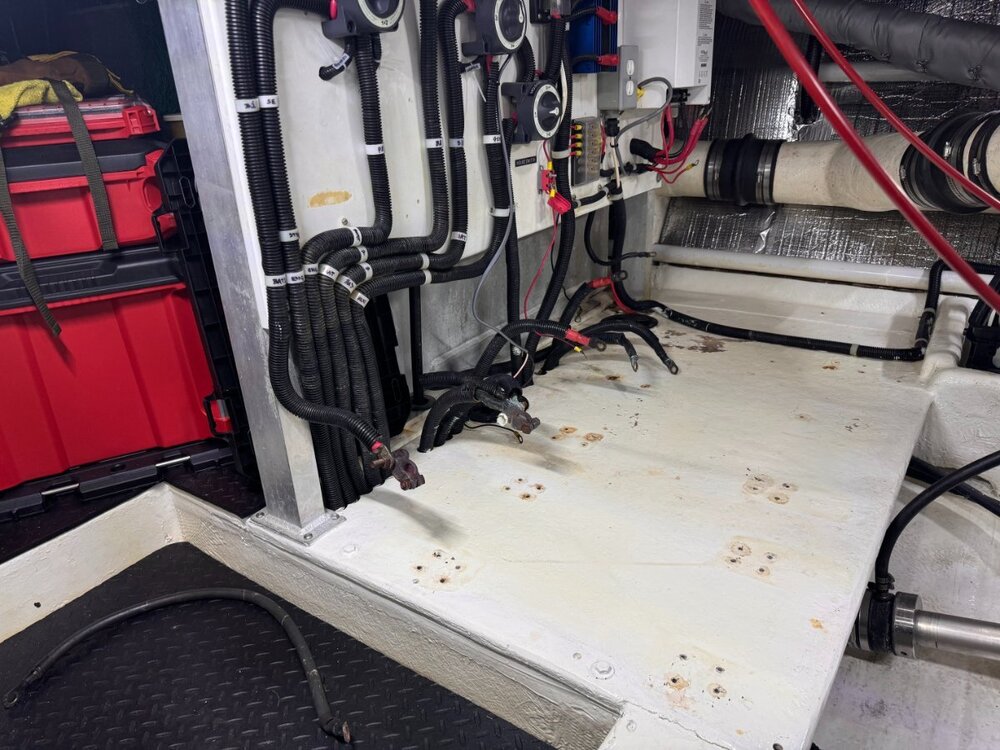
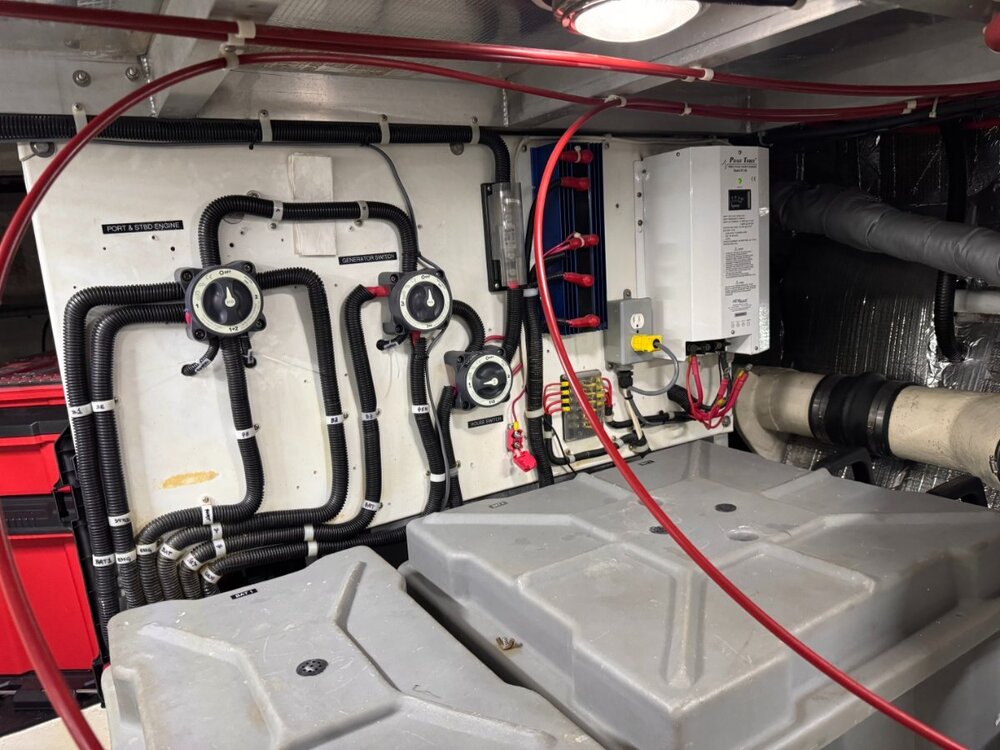
I wasn't able to stretch the ground wire from the starboard engine any further, so that's essentially what controlled my placement on the wall. In this configuration, I will need to run a new ground wire for the generator because it's too short. I'm also planning to replace that glass fuse panel and relocate the A/C outlet once I have everything installed on the wall. Did you also notice that beautiful newly painted floor? Bilge paint specifically designed for engine rooms.
-
Rewiring my start battery wall
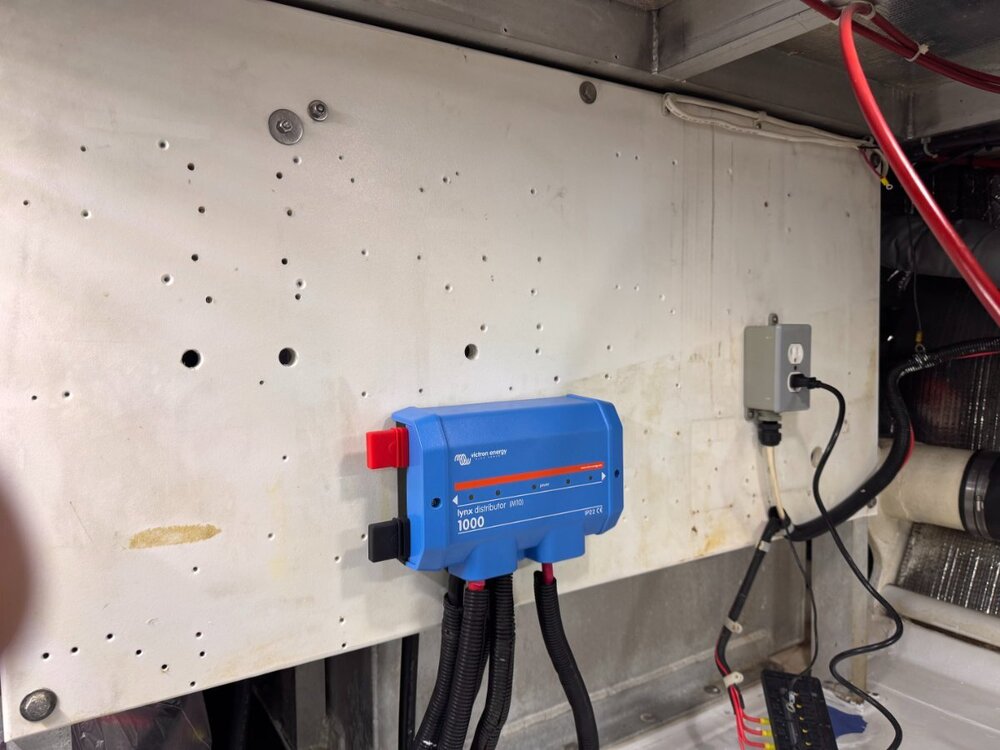
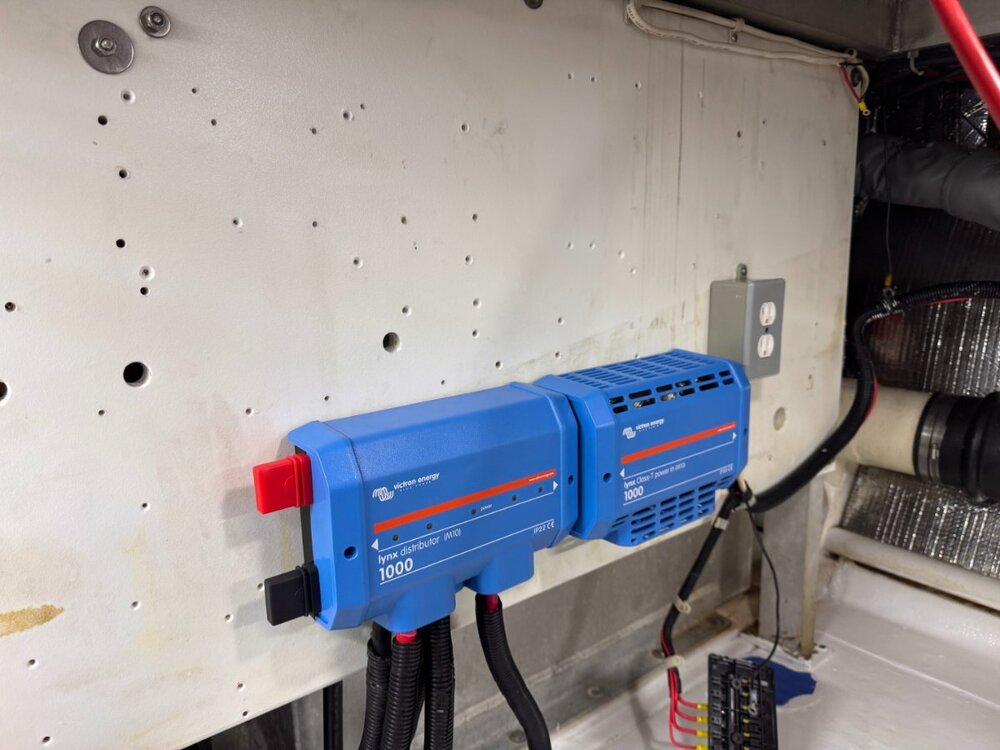
My battery choices still in the air, I decided to start installing the new battery bus bars. I'm using the Victron Class T Power In and a Victron Distributor (both M10 versions). I decided to install these in the center bottom of the wall. The Class T power in gives me battery protection while the distributor gives me a fused connection to each engine plus the generator.
-
Rewiring my start battery wall
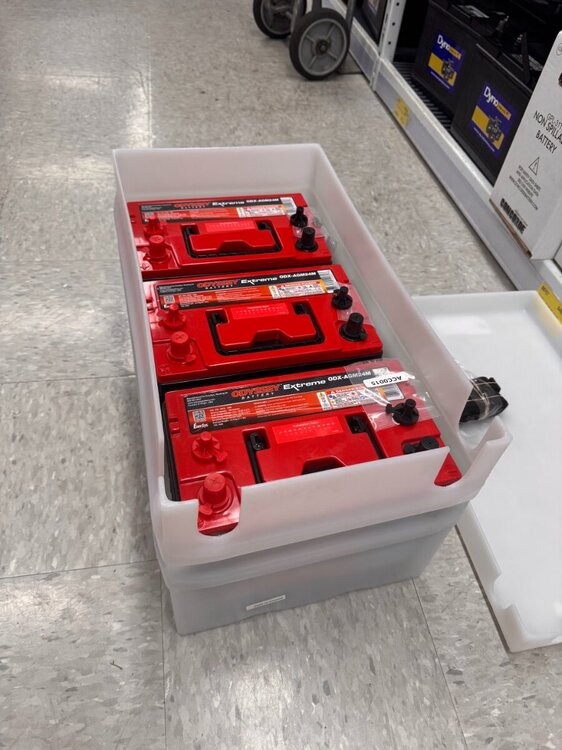
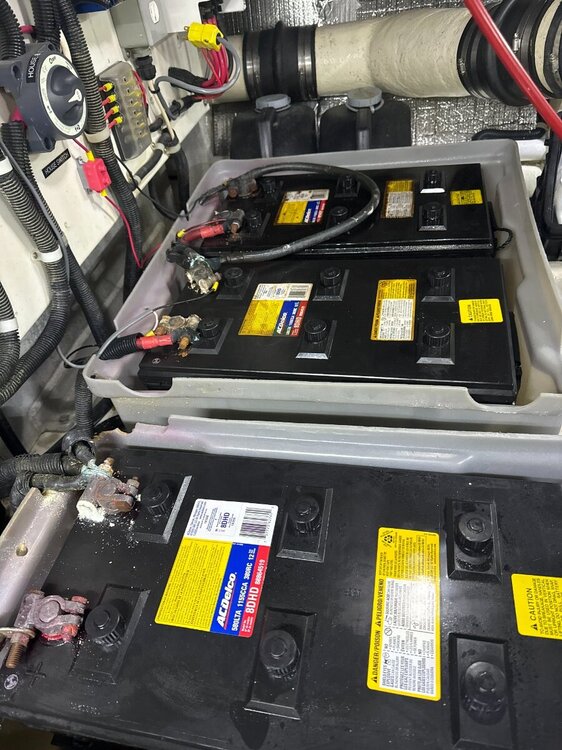
I then found a good solution using G24's and an 8D box. A good substitute if you don't want to move around the large 8D batteries yourself.
-
Rewiring my start battery wall
I then tried fitting different battery solutions on the floor. Group 31: These are a good option and would work fine. However, there are literally no box options for dual or quad G31's on the market. My G31 placement tests were done using the batteries from my thruster bank.
-
Rewiring my start battery wall
If you notice there's a single 2/0 cable in the center with a switch and fuse. This is for the house panel which was originally connected to a single 8D in the battery bank. If you see my other posts, this battery was completely fried which is what prompted this work.
-
Mike started following Holding tank fittings , Rewiring my start battery wall , Stock 8D Battery Woes and 3 others
-
Rewiring my start battery wall
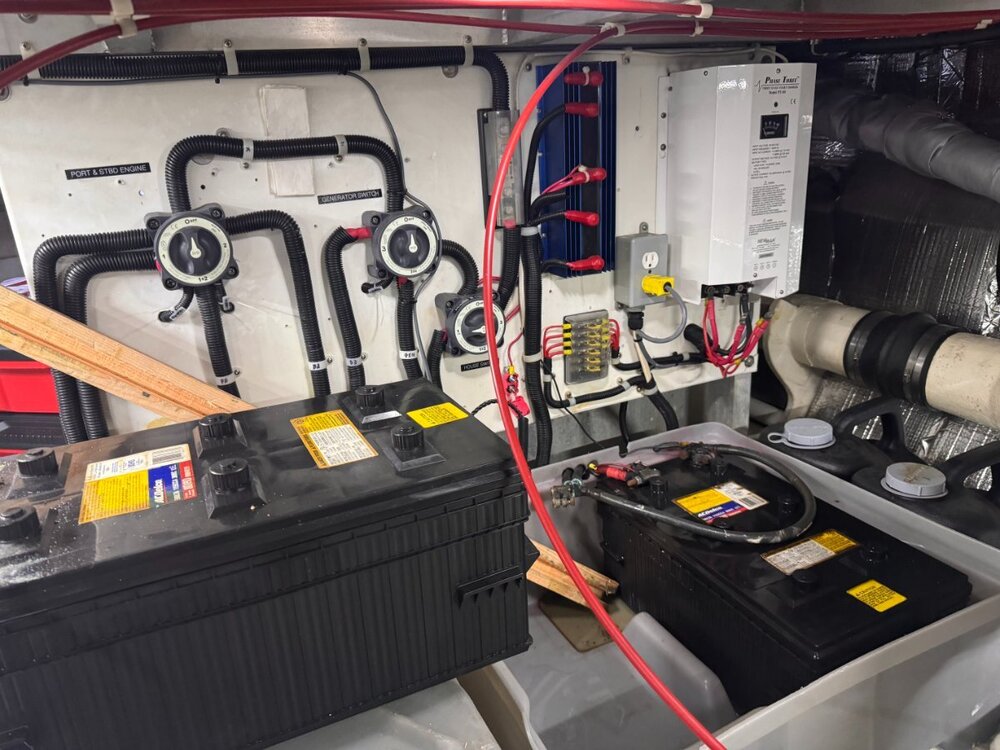
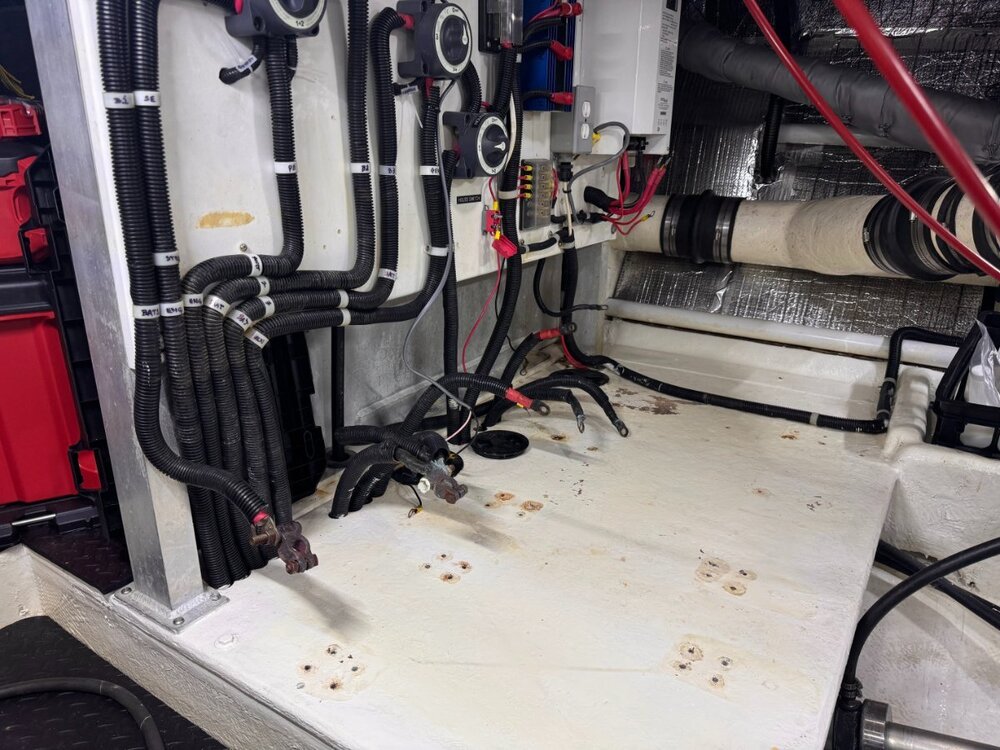
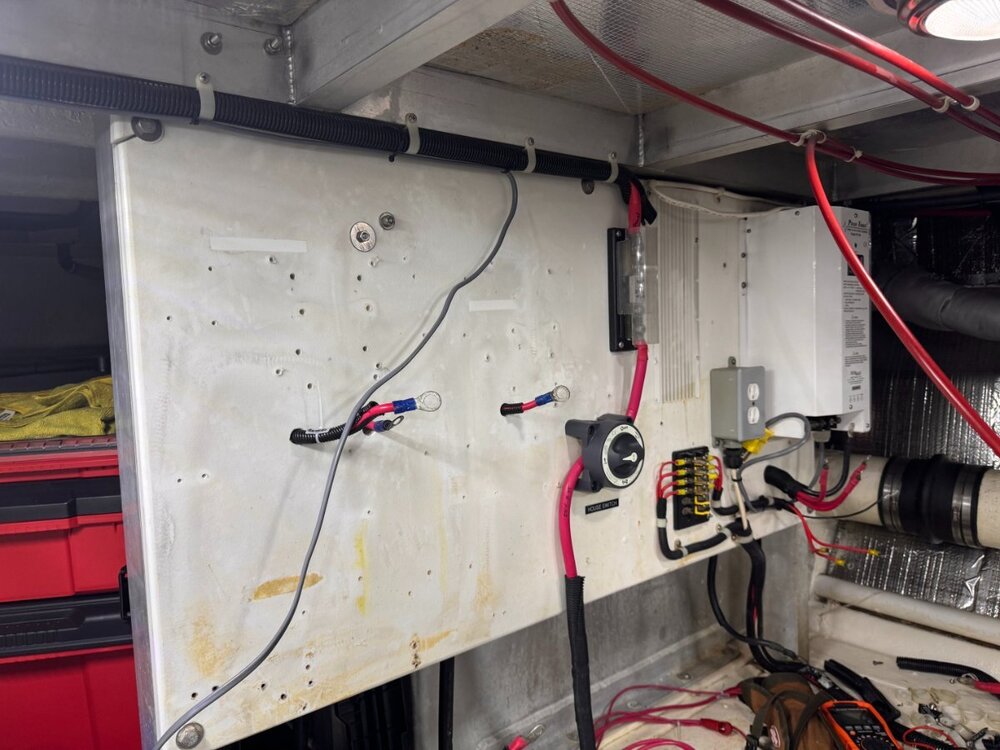
After running into several concerning issues with my engine start batteries, I decided to completely rip apart the stock battery cabling on my Nav 4800. I decided to do this because I noticed several concerning issues. Old charger - No temp monitoring and aging gear without a status panel Excess cabling - too much extra cabling on the wall and under the floors just sitting in the bilge Battery terminals overloaded - the terminals had up to 4 connections Lead acid batteries used automotive connectors Stiff cables - these get very stiff with age No fuses - No protection No temp monitor - No protection Glass fuse block - older fuse block and cheap quality No inverter or thruster battery alternator charging Extra devices without a fuse block Non-labeled cabling - remove and trace all wires and add labeling So my plan was to remove all parts from this wall and rewire with buss-bars and updated electronics. I also removed the house cable loop and terminated it near the new inverter at the front of the engine room. Cables shortened and zip tied so they are no longer sitting on the bilge floor or draped over engine mounts. Here's a photo of the start of my project (during the flooded acid battery removal) Photo of the floor with batteries removed. And finally with most of the wall components removed.
-
Engine Start Battery Research
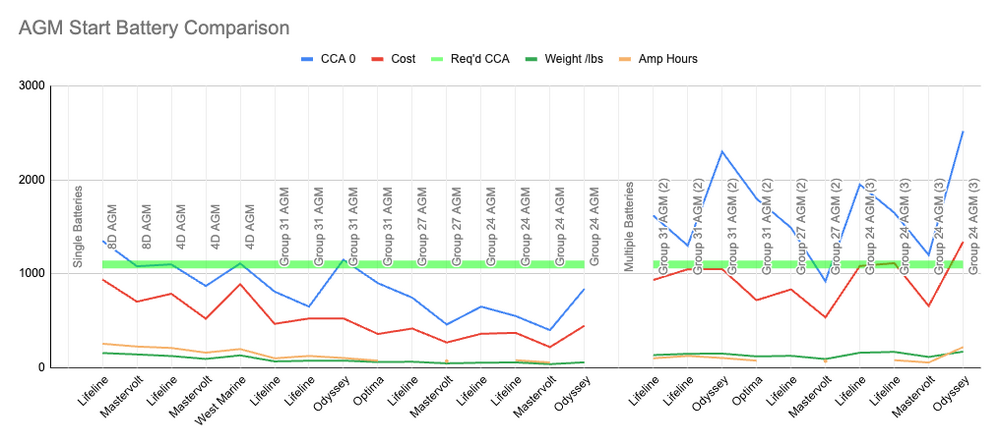
So what about the overall cost? If you look at the chart, you'll notice that multiple batteries is more expensive than going with a single 8D or 4D. My round figure is approximately $1000-$1200 per battery. Since I am going with a redundant system, my budget is around the $2,500 mark. Let's look at each solution (in today's dollars): 2x 8D = $2,238 - Two batteries, two 8D boxes, 312 total lbs 2x 4D = $1,892 - Two batteries, two 4D boxes, 248 total lbs (will it work long term?) 3x G31 = $1,968 - Three batteries, two custom boxes, 225 total lbs (will it work long term?) 6x G24 = $2,682 - Six batteries, two 8D boxes, 342 total lbs There's a lot of factors to consider and I've basically rounded this out to a final answer. The original Navigator design, using an 8D battery, is the best option. Although this battery is heavy, it's got the raw reserve power and simplicity. Other options are certainly capable but they are either difficult to find boxes, more expensive, or complex. Options 1 and 4 are known and proven solutions by many Navigator owners. Option 2 and 3 are certainly possible, but there is a question if these batteries will hold up long term or if they will have enough to start all three engines reliably for years. Are you willing to toss money at something that 'might' or 'might-not' work? If you have the resources to move the MASSIVE 8D batteries around, it's certainly the most efficient and simple way. If you don't have any 'helpers' around, the smaller batteries will give you the capability to move these on your own. PS: You probably noticed I ignored flooded batteries. I hate this battery technology so much that I will never use another flooded battery in my boat. 😉 Dangerous off gassing, acid on your clothing, acid smell, and watering them every quarter.. need I say more? Ok sure, they cannot be fully discharged and literally only provide you with half of the spec listed on paper. Ugh, how bad. Only advantage is they are cheap. PSS: I also want to note that I am going to use boxes. It is NOT required to mount an AGM battery in a box, which is only required to catch acid spills. I've decided to use boxes anyway because I want to stack things on top of my batteries and eliminate any possibility of a short circuit when I'm working in the engine room. Remember, batteries do need to be held down so it cannot move around. Using a battery box makes this a lot easier to manage.
-
Engine Start Battery Research
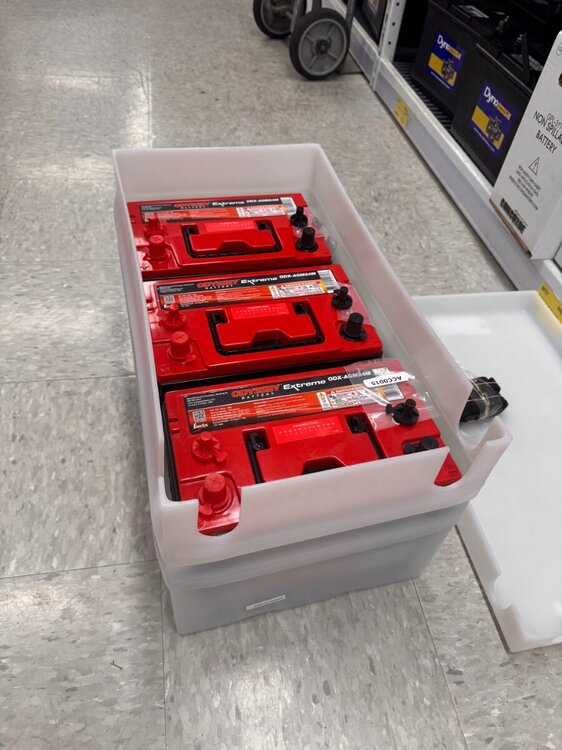
Needless to say, I started looking around for a battery box setup for G31 batteries. Nothing. I mean nada. I even tried driving over to Fisheries and working with the guys to see if they had something to dual G31's into a single box. We came up with nothing. The G31 batteries are about an inch too wide to fit side-by-side in a box. I went back home and did some Internet searching and came up with the same result. However, over at the hull truth site I did see a single post from a guy who found a solution. The company Custom Roto Molding, Inc seems to have a custom built solution. Their boxes are reasonably priced but takes several weeks to have custom made. I have no affiliation with this company and have only read about them. But alas, I need more than 2x G31 batteries (can't forget the generator). It is certainly an option to buy two Custom Roto boxes and install 4x G31's. If you look at my chart above, it will more than suffice. However, I wasn't done yet! If you remember, based on experience from my previous battery setup (only a single 8D starting all three engines reliably), I decided this would be my 'standard' when choosing new batteries. So I continued to calculate it. Looking at that same chart, I discovered the following configurations will absolutlely work well for a triple engine start solution: 1x 8D 1x 4D (would need RL verification) 1x G31 2x G27 (not Mastervolt) 3x G24 The above list works for a single engine. Since the G27 is only 3/4" smaller I ignored this form factor. So, my last option was to look at the 3x G24. Specs seem fine, and it meets both my CCA and Ah requirements. But is there a box for these batteries? There sure is! 3x G24 batteries will fit into a single 8D box. Here's proof. Score!!! This is a photo of three Odyssey G24 batteries fitting into a single 8D box. Let's weigh the advantages and disadvantages. Advantages: Lighter batteries to move - Each battery weights significantly less than a single 8D or 4D, of course Clean box solution Ah is good - Combined approx 240 Ah More CCA than required - Combined CCA approx 1,980 Disadvantages: Jumper Cables - This setup needs to have custom jumper wires built (PITA) More points of Failure - As with all battery setups, corrosion on the terminals, shorts, etc Cost - Purchasing three batteries does cost more money, labor, and cabling To be continued
-
Engine Start Battery Research
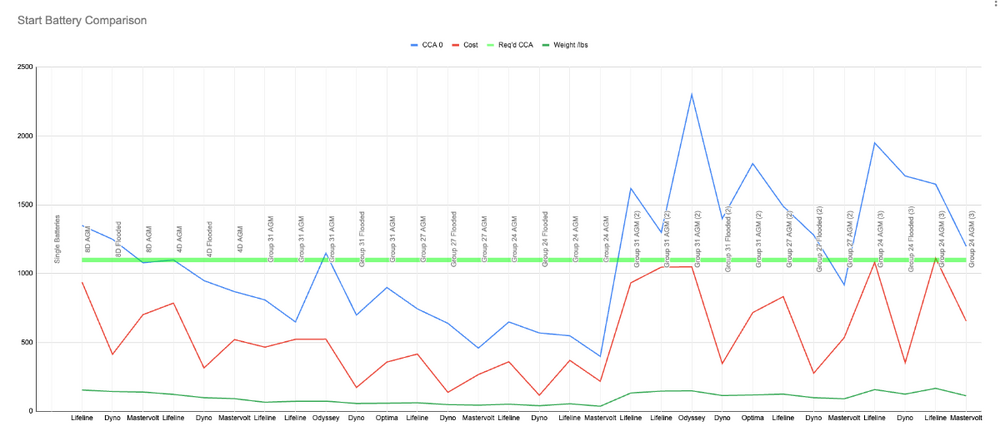
I did a lot of work researching different battery types for my engine-start application. The following conditions were analyzed. Form Factor - 8D, 4D, G31, G27, and G24 Chemistry - Flooded, AGM, LiFePo - Since this is engine start, I ignored Li Cold Cranking Amps (CCA) - 1100 - This is the 0 degree value Marine Cranking Amps (MCA) - Ignored - This is the 32f degree value and not all batteries had this rating Amp Hours (Ah) - 200-300 - Basically the amount of reserve power required to start multiple engines. I went through all of the battery options I could find at Fisheries Supply. I also compared a few others from West Marine and online sources but it turns out that most batteries end up showing similar results. A few exceptions with higher performance batteries in the smaller form factor. I first calculated the values for a single battery, and then later in my evaluation I decided to calculate the values based on combined batteries. See the following chart (crude that it may be, and some generalization): The green line in the middle indicates my most important attribute, CCA. I needed to find a battery that could easily crank both engines and 1100 CCA is the value I found works well for the TAMD63. As you can see, there are only a few single batteries that will meet this important spec. Of course Navigator installed 8D flooded batteries back when the boat was new. These work fine and I can see why they chose this format. However, one battery in the middle stuck out, and it's the Odyssey G31. It seems to have the CCA value necessary to turn the engine and get it started. The only other contender was the 4D AGM, which also seemed to meet the spec. But one thing had me worried, and that's the G31 might not have enough power, after a single start, to get the next engine cranking. So, I looked at the Ah rating for both batteries. 8D = Around 255 Ah 4D = Around 210 Ah G31 = Around 100 Ah Based on these facts, I decided a single G31 battery would not cut it as a single engine start solution. But one per engine would work fine. But what about the generator? Hmmm.... Also I am no longer considering Flooded batteries, so here's the same chart with AGM values. I've also added a West Marine option and a G24 Odyssey I found at Fisheries today. To be continued...
-
Stock 8D Battery Woes
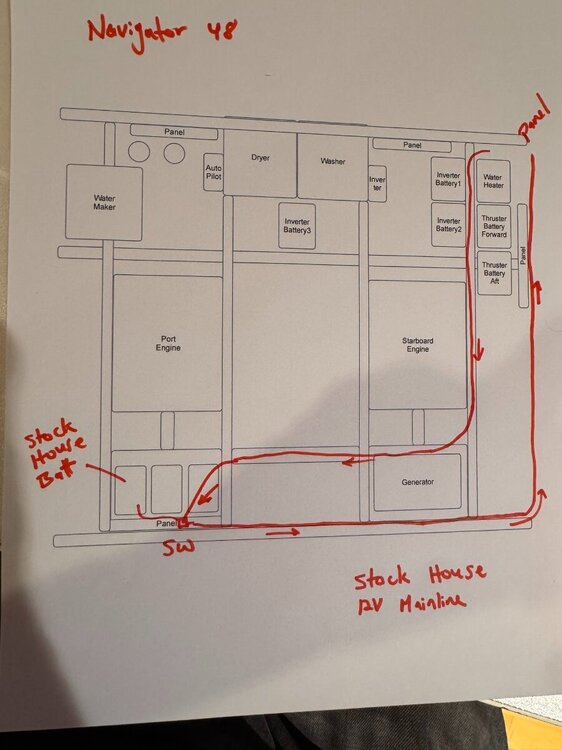
Following up, interestingly, this mainline house cable ran across the engine room floor (next to the starboard engine) and underneath the switch wall. This was then connected to the switch you see in the above photo. The line then runs across the ceiling back to the front starboard side and up to the panel. I've removed this entire line because my entire house battery bank is located near the washer/dryer in the front starboard side of the engine room.
-
Stock 8D Battery Woes
Today I removed the stock battery switching layout. Turns out someone installed a mainline from my inverter directly to this switch wall. I believe this is what caused my stock 8D battery to cook. The new line comes up from the bottom (see attached photo) and then continues up to the main panel. Funny thing is, this line comes directly from the Inverter batteries directly below the main panel and then loops back up through the ceiling of the engine room. I'll be remedying that soon. 😉
-
Stock 8D Battery Woes
Battery lift day! Unfortunately I didn't take any photos but this also turned out to be easier than I expected. I brought my teenage son and wife along for this adventure. All we did was use some dock line, fed the end through both battery handles, and pulled them up and out. Easy peasy! We then loaded the batteries into the dock carts, put them into my truck, and drove to our local transfer station. Battery recycling is free here in Seattle, so I paid nothing to get these things out of my hair. Now all I have left to do is play around with new cables, crimps, and I do plan on installing some additional Victron gear. Bust out another thousand. Cheers!
-
Stock 8D Battery Woes
I started asking around in the Victron and Navigator clubs. Most people suggested that I hire someone on the dock to remove the batteries. Problem with that is my marina doesn't really have anyone around to do that kind of work. It's a private marina with some local liveaboards and most of the boats are owned by retirees or something. So, I was on my own. One of the best pieces of advice I got was to use wood 2x4's. In fact, I had a total of one 2x4 and brought it to the boat. I also brought along my wrecking crowbar and some grubby clothes. Amazingly enough, the wood technique was all I needed. Lift up one side of the 8D battery, slip in the 2x4, wrestle things around a bit, and pull the battery out of the box (using the 2x4 as a slide). It worked very well! I managed to get all three batteries out of their protective boxes without issue. No broken fingers or battery acid burns. A little tingling and itching along the way, but it wasn't bad. I also have to mention I used eye protection and gloves just in case. Oh, that battery acid smell just never leaves. Yuck. I then used the same piece of wood and slid the batteries along the floor to the aft section of the engine room. Not too bad. I lined up all three batteries for the next day when I attempt to remove the batteries through the top hatch. That is going to be fun! I also want to mention that my battery boxes were doing their job. You can see noticable puddles of battery acid at the bottom of the box. I'm not sure what Navigator was thinking, but they decided to drill holes in the bottoms of the box and screwed them into the wood support below. Dumb design because these boxes would likely leak acid into the bilge if they cracked or broke at their mount points. But I guess in the early 2000's this was allowed. I used several old rags to soak up the battery acid and cleaned up the boxes. Then I removed the screws, ripped out the boxes, and scraped the floor. Before installing new batteries, I do plan on filling the holes and sealing the floor again with bilge paint.
-
Stock 8D Battery Woes
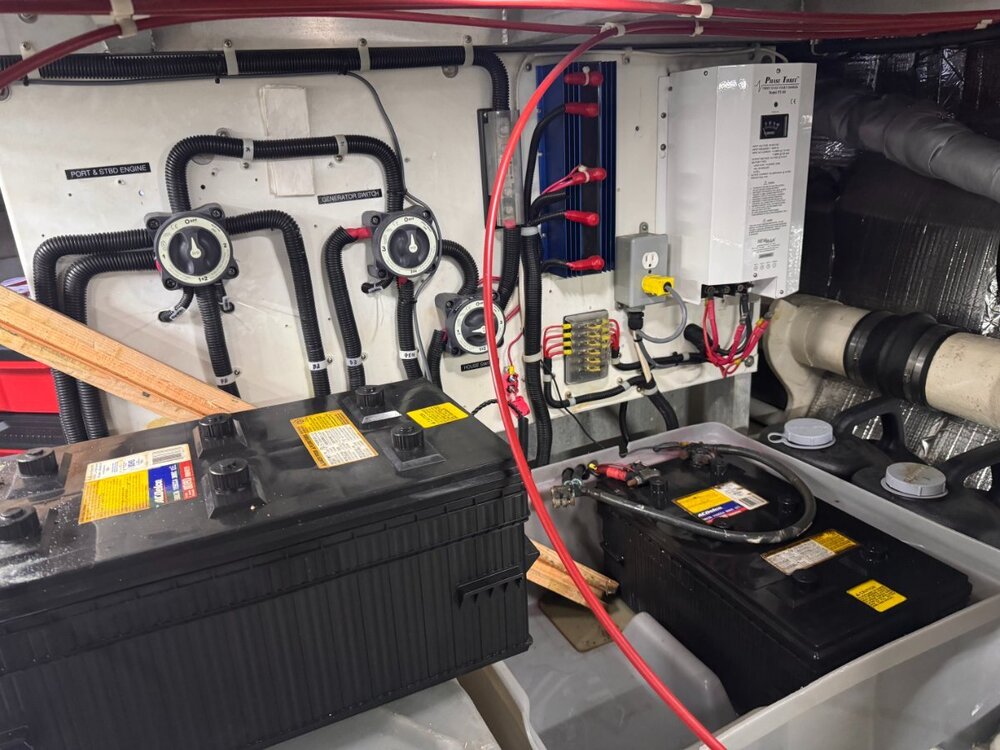
So I took on this crazy job myself. Removing old "cooked" 8D flooded lead acid batteries. What a messy job. Navigator typically provided three 8D FLA batteries in their 'typical' production line as follows: Battery 1 - Engine Start Battery - Engine 1 & 2 switch + crossover to battery 2 Battery 2 - Generator Start Battery - Generator & Engine crossover Battery 3 - House Battery - Typically fed directly to the panel All three of these batteries could also be combined in case one of them failed. Here's what a typical setup looked like (some may vary of course): Battery 1 on the left. Switches organized as I mentioned above. In my situation, a previous owner also added a Victron 12/3000/120 inverter forward of the starboard engine. Inverter has 6x (6vdc) batteries wired in series and parallel (3 total banks). Great setup, but installed very sloppy. I'm finding that most boat owners are adding inverters to older boats, thus overriding the need for a stock house battery. So, one day I decided to take a look at my old stock batteries. There wasn't any real concern because the engines were starting fine. However, there was a distinct chemical smell coming from the engine room every time I cracked open the access hatch. What did I find? Battery 3 was getting HOT!! ... This was a very concerning issue for me as I know what can happen in this situation. I immediately cracked open the battery boxes and found battery 3 heating up and labels that were slowly burning off. Yikes! Battery 1 was fine (engine start). Battery 2 was completely BONE DRY. Battery 3 the hot culprit. After tracing all the wires, I decided to do some testing. So, I started flipping those three switches around. And, I discovered every time I flipped battery 3, the new Inverter would start making sounds like it was working overtime. Fans were kicking on and I noticed some of my 12vdc circuits were either dimming or pumps slowing down. From what I could tell, the installers for the inverter had managed to cross connect the inverter to the generator, which then affected the house circuit. After all this, I did some measurements and found out the inverter was cooking battery 3 to death. This was not good for inverter, batteries, or the house panel, so I decided to take battery 3 completely offline. I think it took about 2 days to fully cool down. lol Anyway, knowing that I probably saved myself from a boat fire I decided to also top off the battery water and do some voltage testing. Battery 1 - 12.9vdc Battery 2 - 1.8vdc Battery 3 - 4.6vdc Yep, the batteries were shot (except for B1 of course). I then turned on the battery charger, and looks like the charger was doing its job. I started to see voltages climbing back up. But they did not hold. At least 2 dead batteries. So yeah I decided to remove all three batteries. I don't want any more flooded lead acid in my boat. Too dangerous and that battery acid burns the skin. Not to mention off-gassing risks. I am just done. Read next post for my battery removal technique.
-
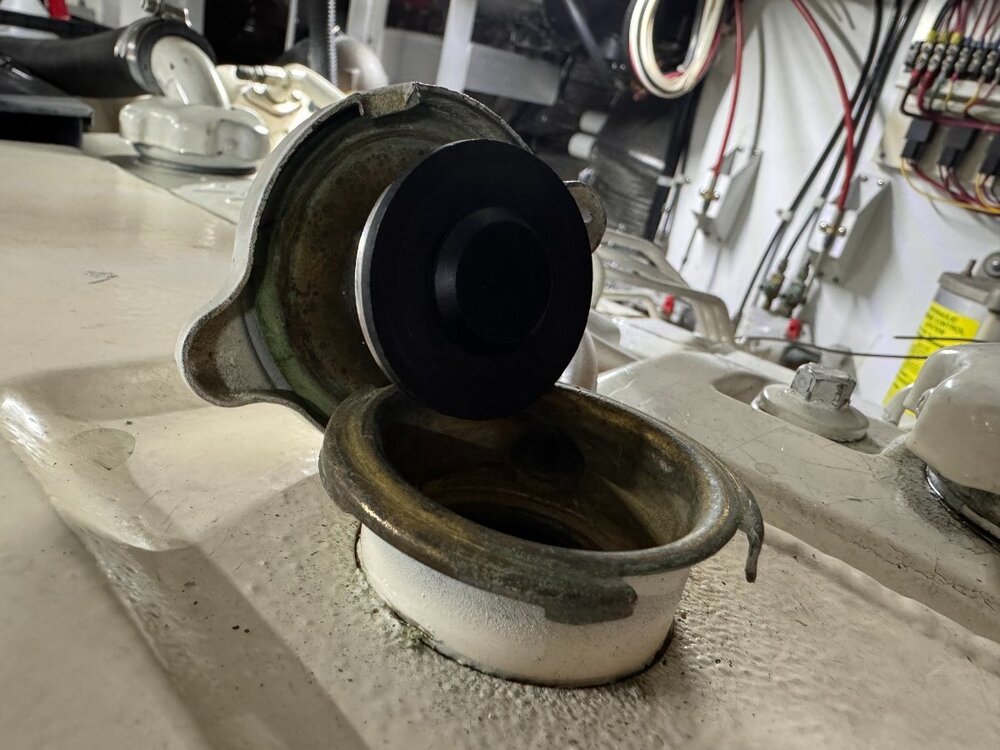
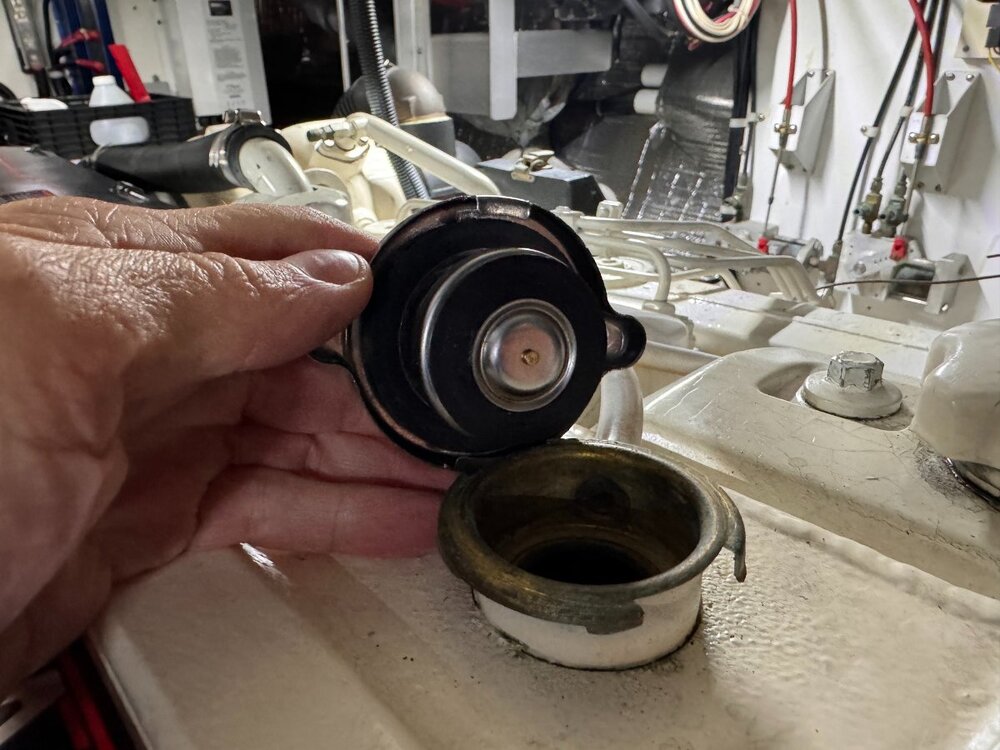
Coolant cap gasket on TAMD63
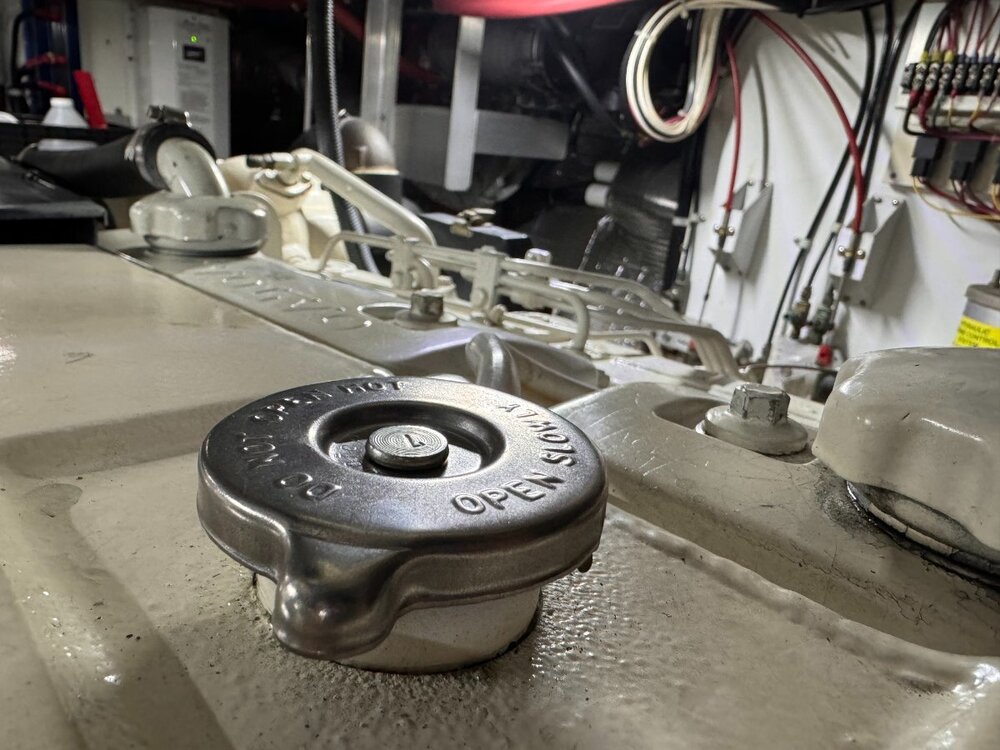
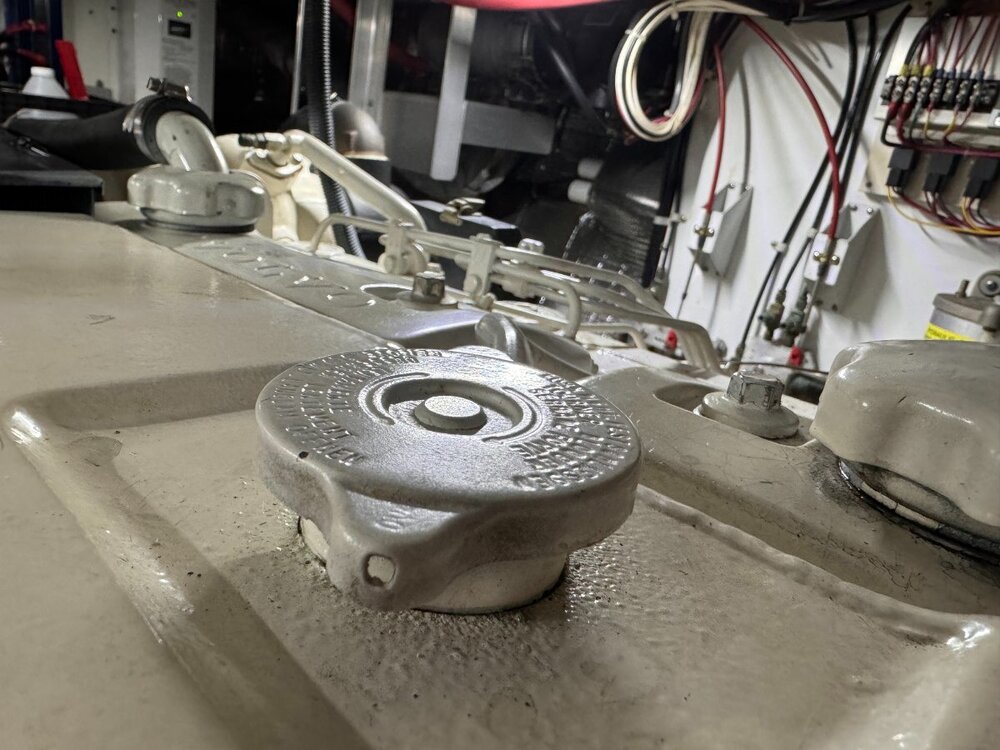
The coolant cap on my TAMD63 was flagged as incorrect on the survey when I purchased my boat. This was interesting to me because the cap looks like it is original. After doing a lot of digging, and questions with various diesel technicians, I discovered the surveyor is correct. Apparently, if you are using an external recovery tank, the coolant cap needs to have a rubber gasket on the top rim. If you don't have a rubber gasket, it can prevent the coolant from returning to the engine when it cools down. I checked the Volvo Penta parts diagram and apparently the original cap (even the replacement) does not come with this gasket. Possibly because the original design didn't include an external recovery tank??? The surveyor recommended a Stant cap at 7psi (or 50 kPa), which you can find almost anywhere.
-
Email services
Today I was able to get the email services and relay working. If you've been trying to register and did not receive the activation email, please re-send the email confirmation and it will work. Tested this morning. Thank you! Mike
-
gholsie joined the community
-
Brower Davit Crane
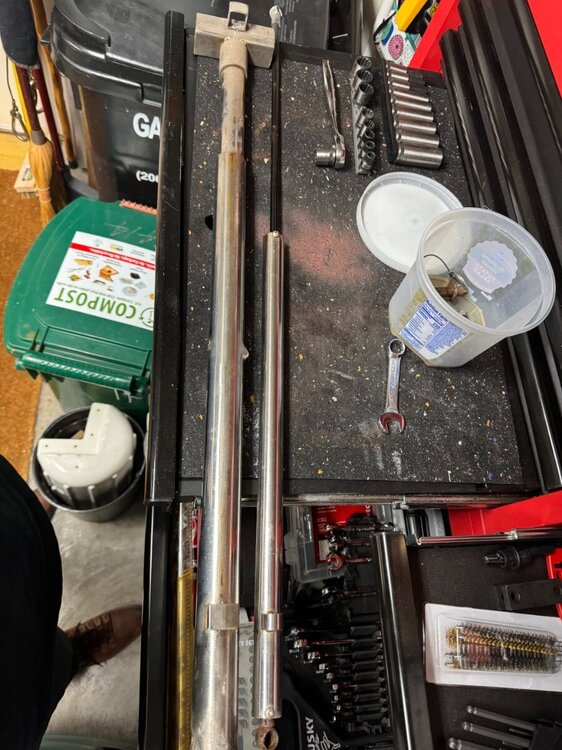
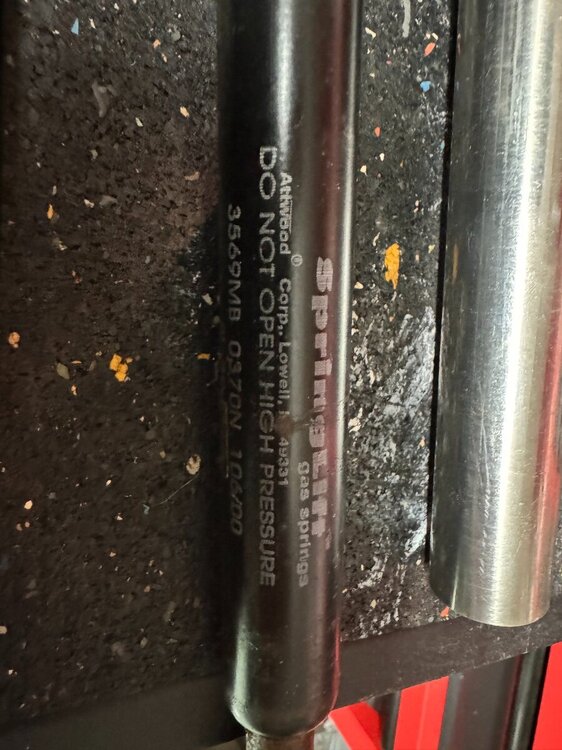
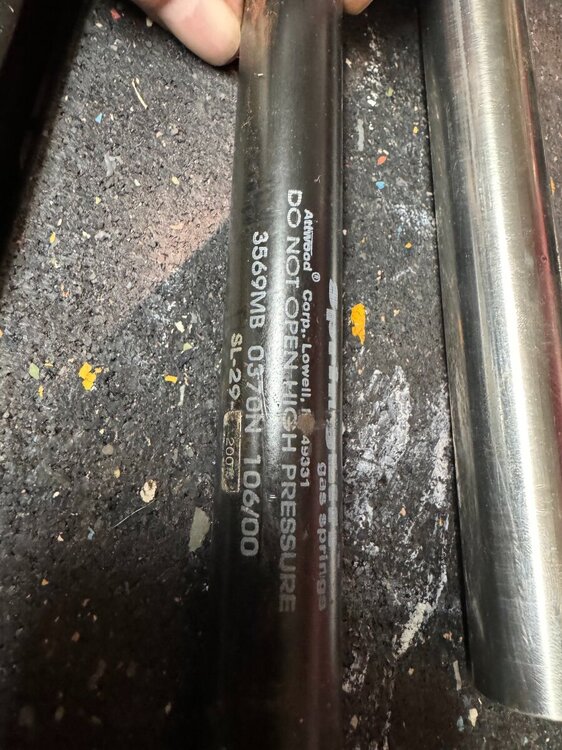
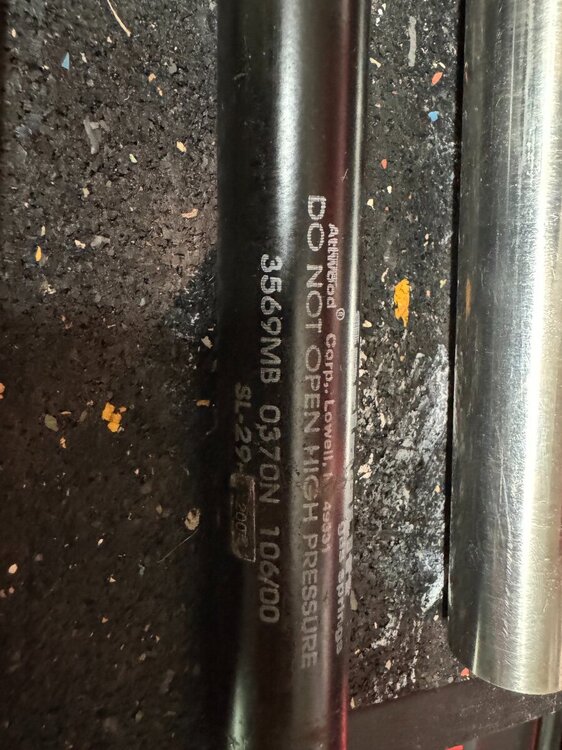
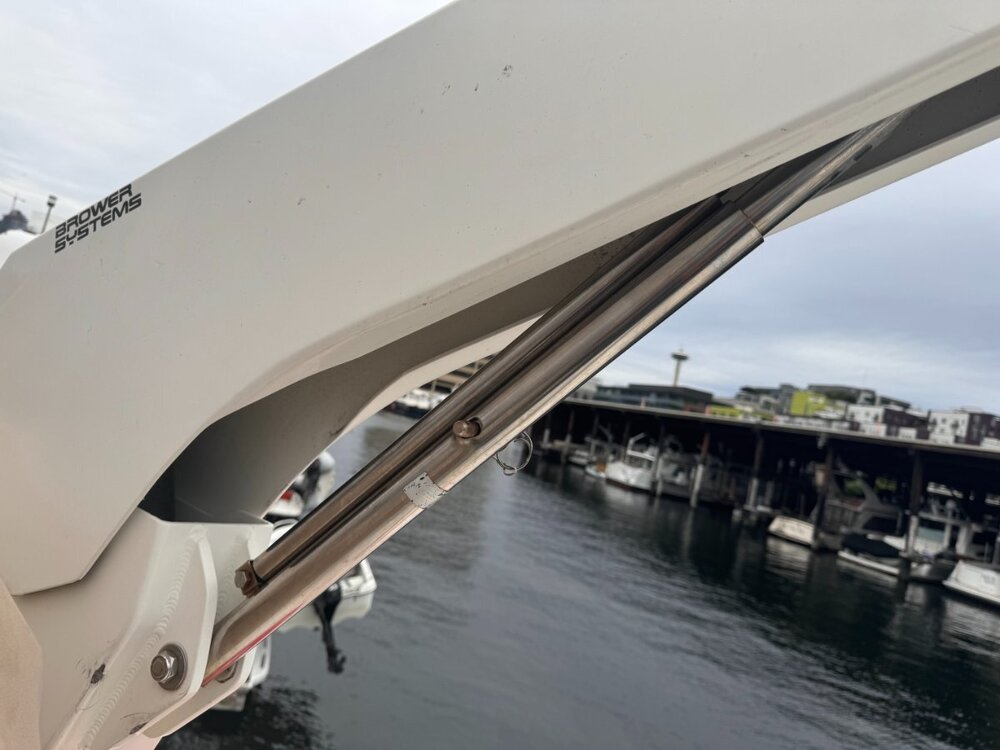
Factory gas strut = SpringLift (Attwood) # SL-29-200
-
Brower Davit Crane
-
Brower Davit Crane
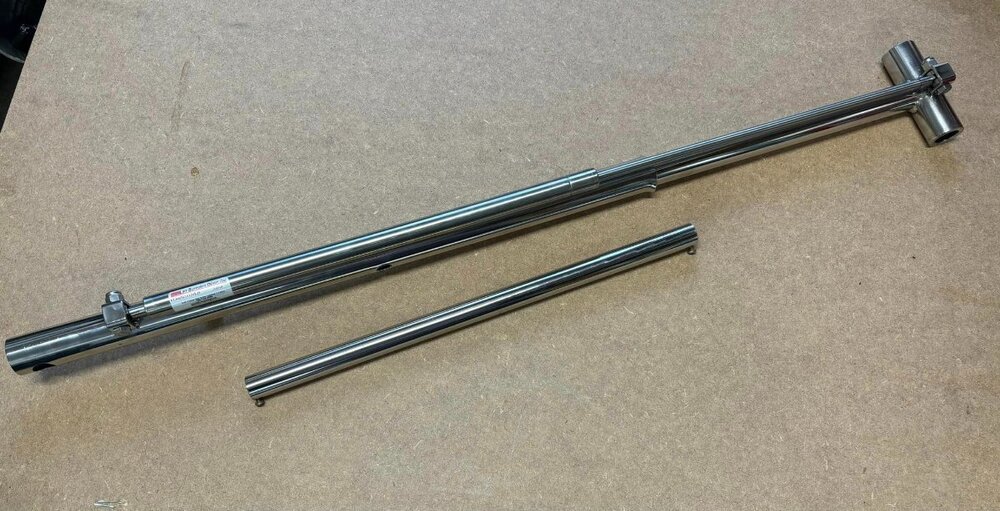
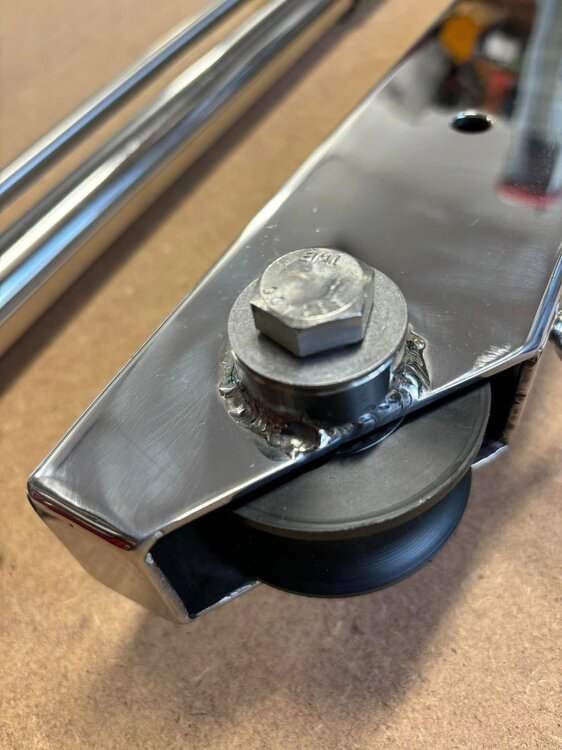
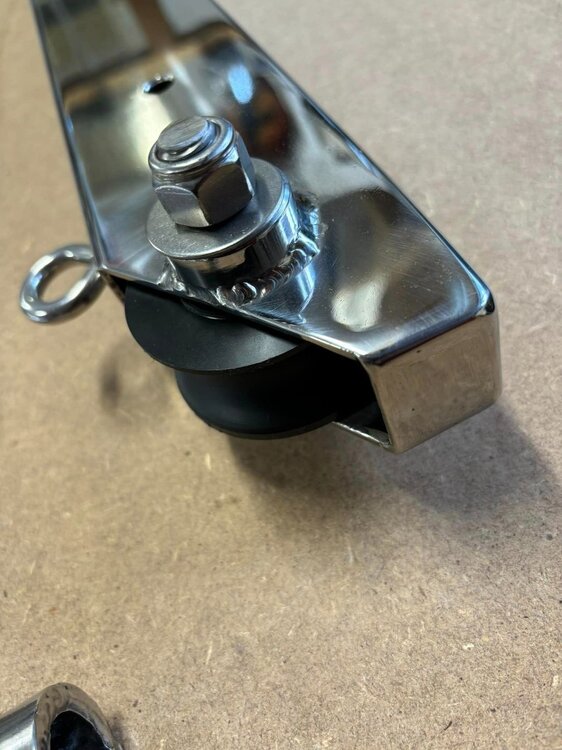
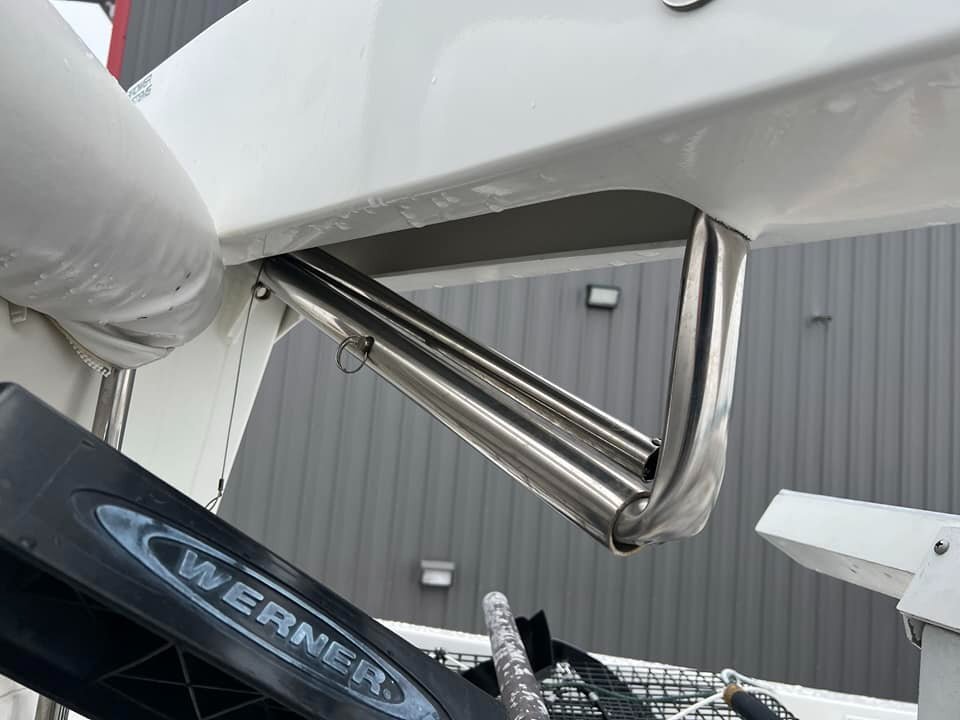
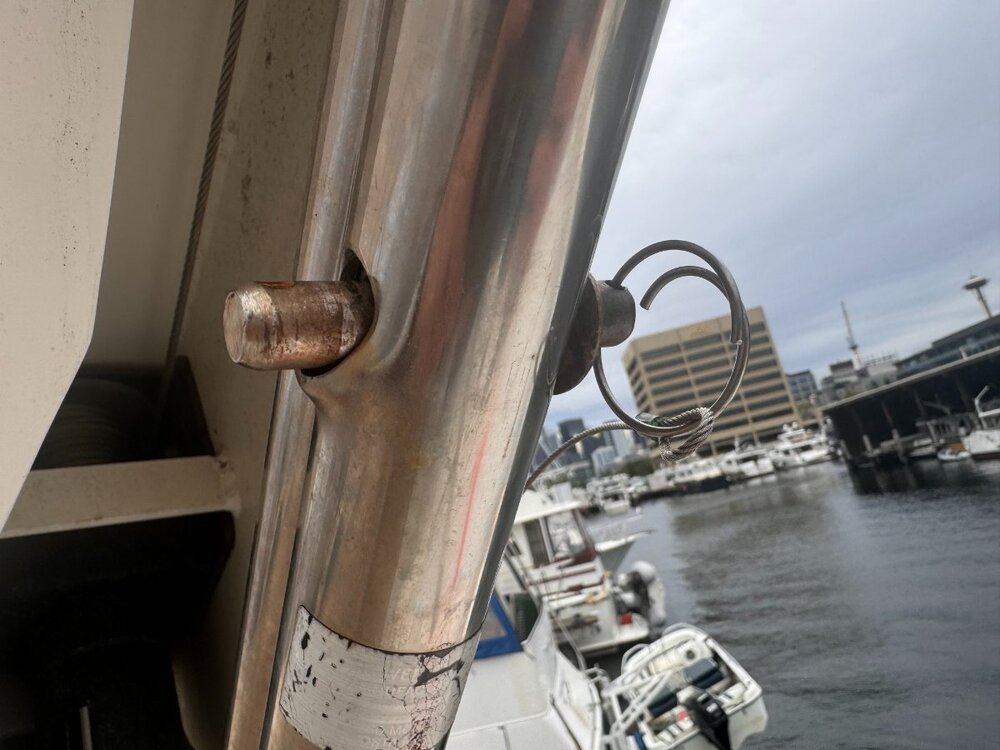
Here are some photos from another member showing off his modifications (reinforcement welded to the sheave) and new gas strut. I spoke with him and found out the top of his external shaft was bent when they let the crane down too far (you can see it in the photos). He also noted the gas shock doesn't really need the tube installed. The tube is shown separate from the assembly and merely to clean up the install.
-
Brower Davit Crane
Here's a photo of a failed Brower crane on another boat (not mine). This was likely a very scary moment. Luckily nobody was hurt. Notice how the failure point was the internal tube, which I thought was solid core. Based on what I see here, the internal tube is also hollow.
-
Brower Davit Crane
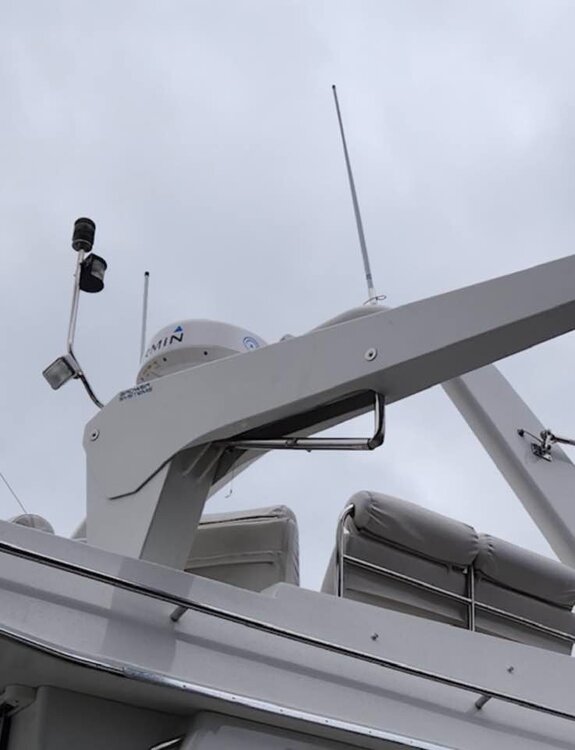
So I have a situation with my Brower 800. This didn't show up on the survey but I noticed the main support tube has been overloaded at some point in its lifetime. See photos below. I jumped into the Navigator owners group and received some replies below. Nonetheless, it looks like I'll be fixing the stress point as soon as possible. My biggest problem is the dinghy is in the water and now I'll have to pull it out via trailer until this is fixed. It looks like Brower Systems is out of business. I did find this post over at Yacht Forums and this post over at Trawler Forums. According to my research, there aren't any replacement parts available so it looks like this may have to be custom fabrication. Unless, of course, I can find an older 800 that can be parted out.
- Holding tank fittings
-
Holding tank fittings
- Holding tank fittings
-
Holding tank fittings
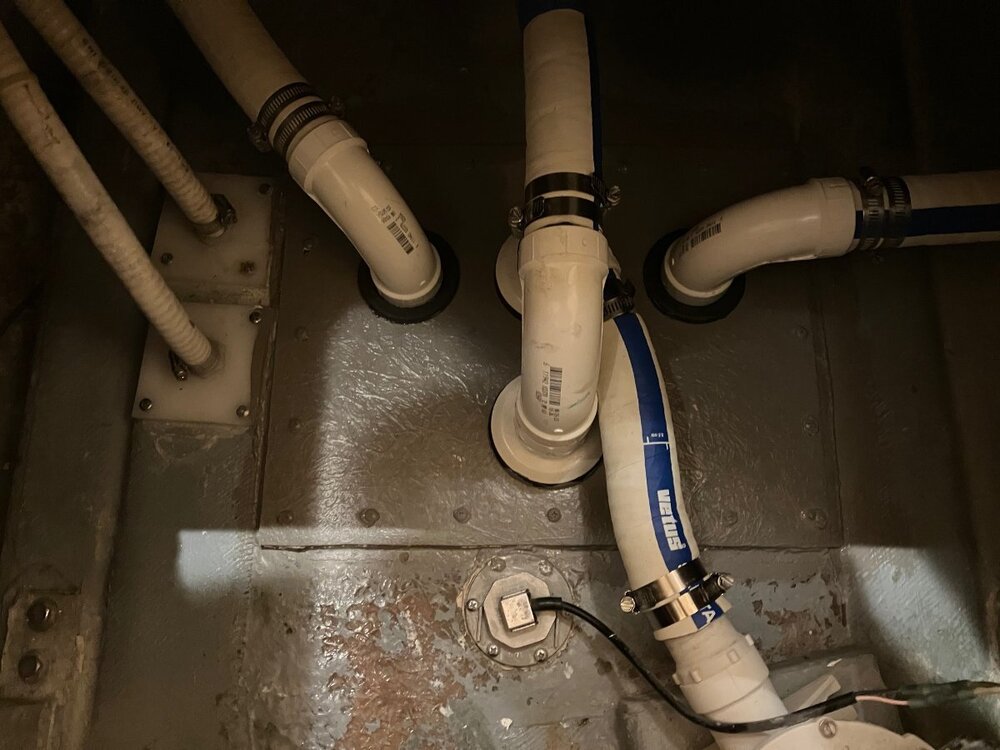
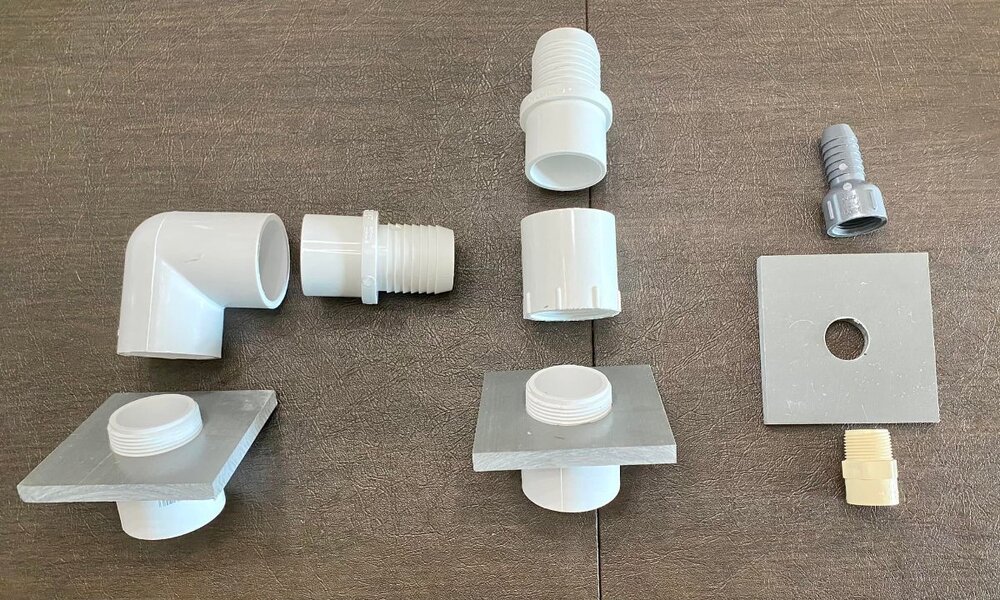
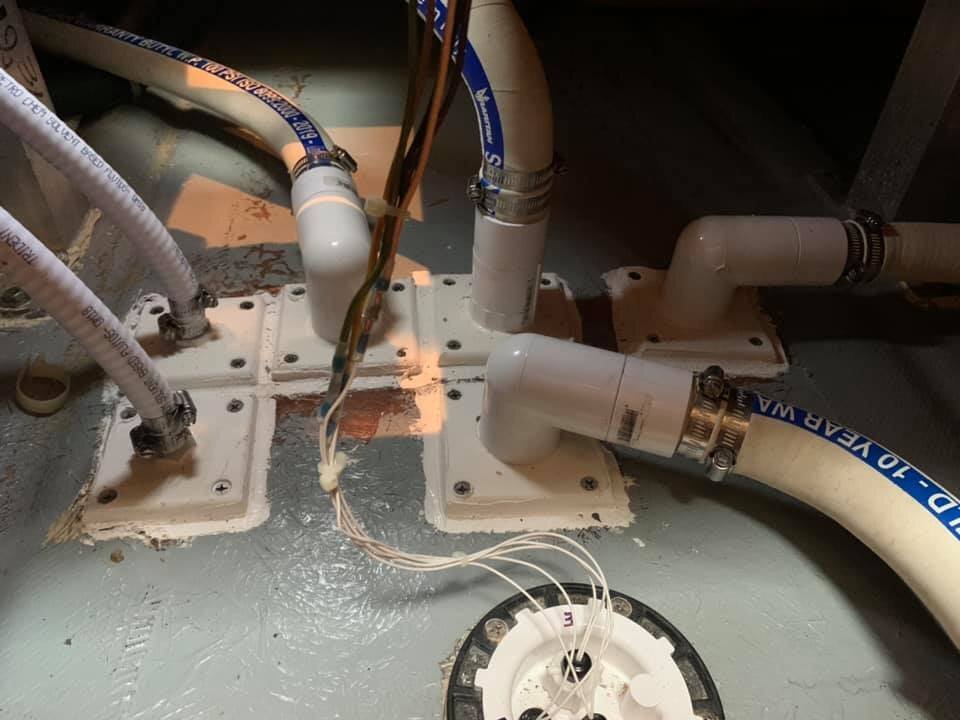
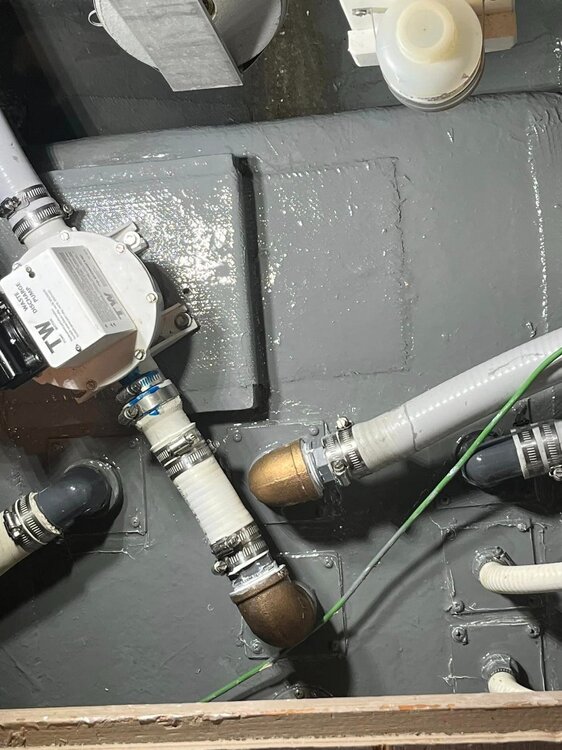
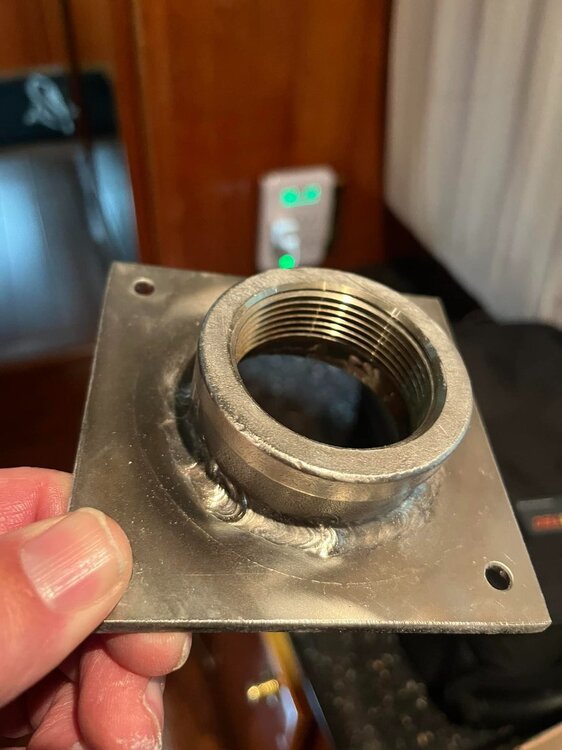
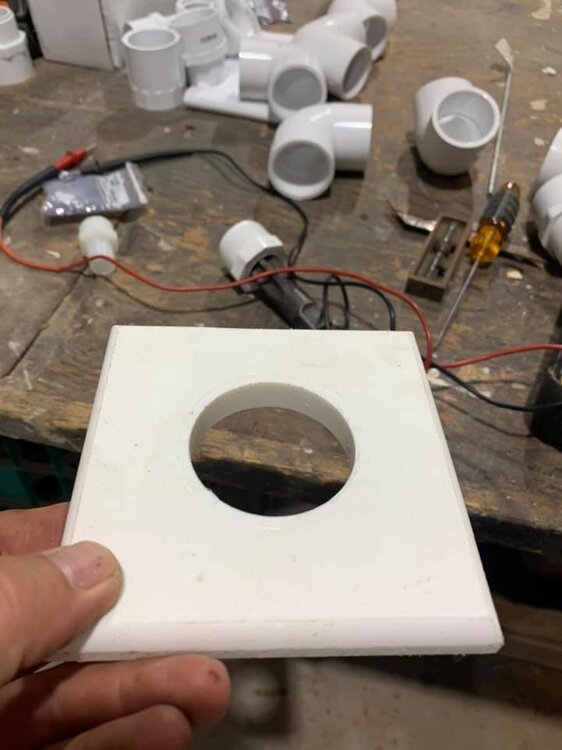
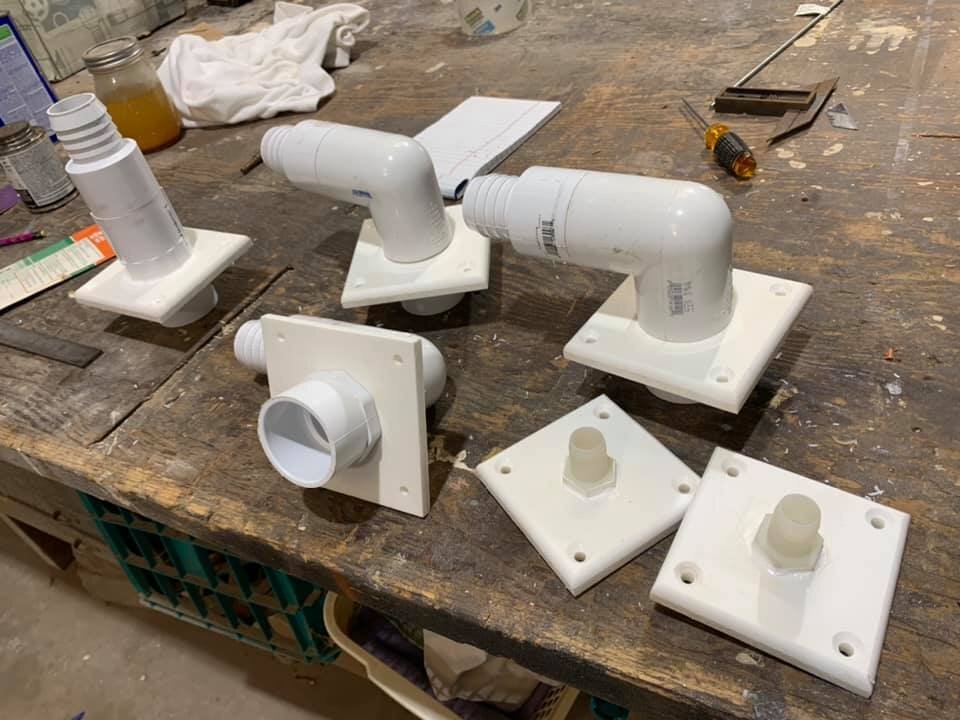
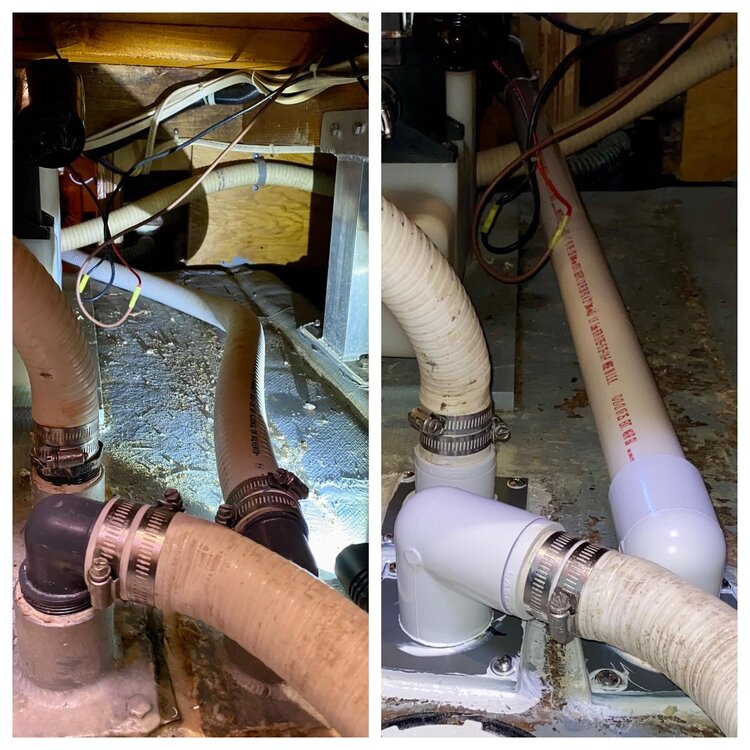
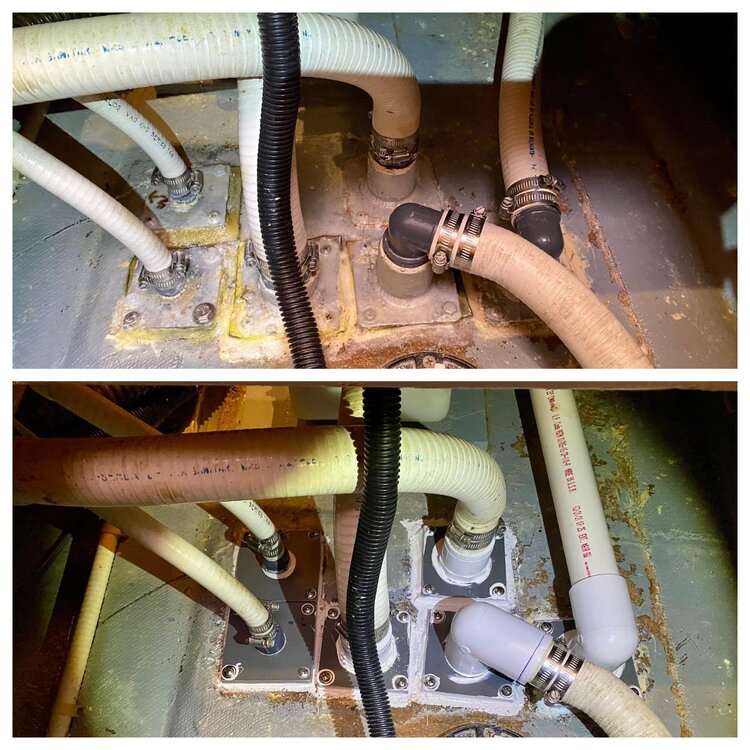
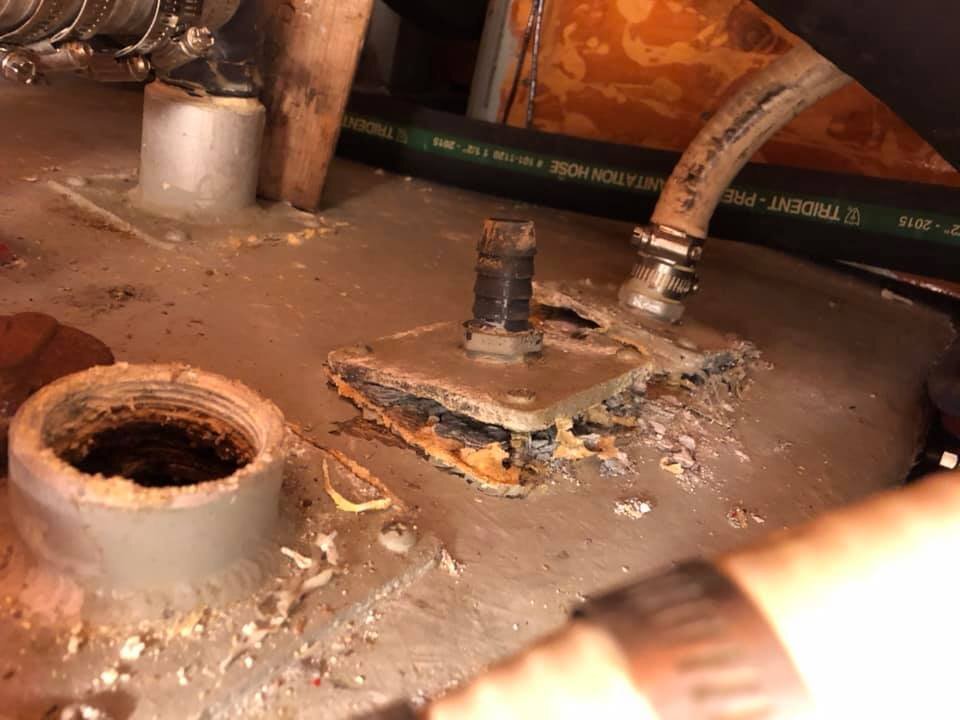
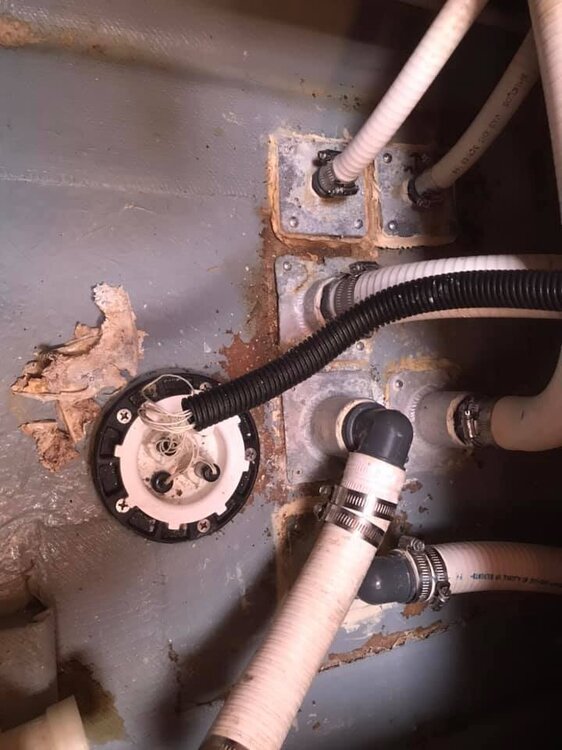
Ever wonder why the Navigator has a holding tank smell (sometimes)? Looks like the fittings that Navator used are prime for corrosion. Here are some photos of before and after fittings were replaced on various boats.

